VuePress 2.x Getting Started
In this guide we will be looking into VuePress 2.x which currently is in beta but very promising. We will build simple customized blog with home page only. Using this skeleton can be just enough for many people who would like to quickly get something easy to use, working, fast and very nice looking...
Install NodeJS
VuePress required NodeJS to be installed. Please check download page to see how to install it on your operating system.
I personally always prefer use command line:
brew reinstall node
scoop install nodejs
TIP
See more options here
Initialize project
Create (for example: customized-vuepress-2-blog) project folder and initialize NodeJS project in it:
mkdir ~/customized-vuepress-2-blog && cd $_
npm init -y
mkdir %USERPROFILE%\customized-vuepress-2-blog
cd %USERPROFILE%\customized-vuepress-2-blog
npm init -y
Install minimal require software
Let's install vuepress 2.x as our main blog engine, rimraf to clean files and folders, cross-env and NodeJS types (see package.json file):
npm i -ED vuepress@next
npm i -ED cross-env rimraf @types/npm
Git ignore configuration
Let's ignore IntelliJ IDEA NodeJS modules and VuePress temporal, cache and output folders and files in .gitginore file:
echo "/.idea/"            >> .gitignore
echo "/.vuepress/.cache/" >> .gitignore
echo "/.vuepress/.temp/"  >> .gitignore
echo "/.vuepress/dist/"   >> .gitignore
echo "/node_modules/"     >> .gitignore
Add NPM scripts
Update package.json file with next npm-scripts:
{
  "scripts": {
    "dev": "vuepress dev .",
    "build": "vuepress build ."
  }
}
Static resources
Our site should looks unique, so we will require to add our photos, pictures or favicon logos... If you want to refer on some picture or any other resource by static path you should place that resource in .vuepress/public folder. For example I have 2 files I'm referring on: favicon.ico and me-2020-11.jpeg in that folder:
.vuepress/public
├── favicon.ico
└── me-2020-11.jpeg
Site content
Last missing peace we left to do is write our blog home page in user friendly markdown format (file with .md extensions). This will help us focus on a writing only and VuePress will take care of everything else: styles, positioning, fonts, highlighting, etc...
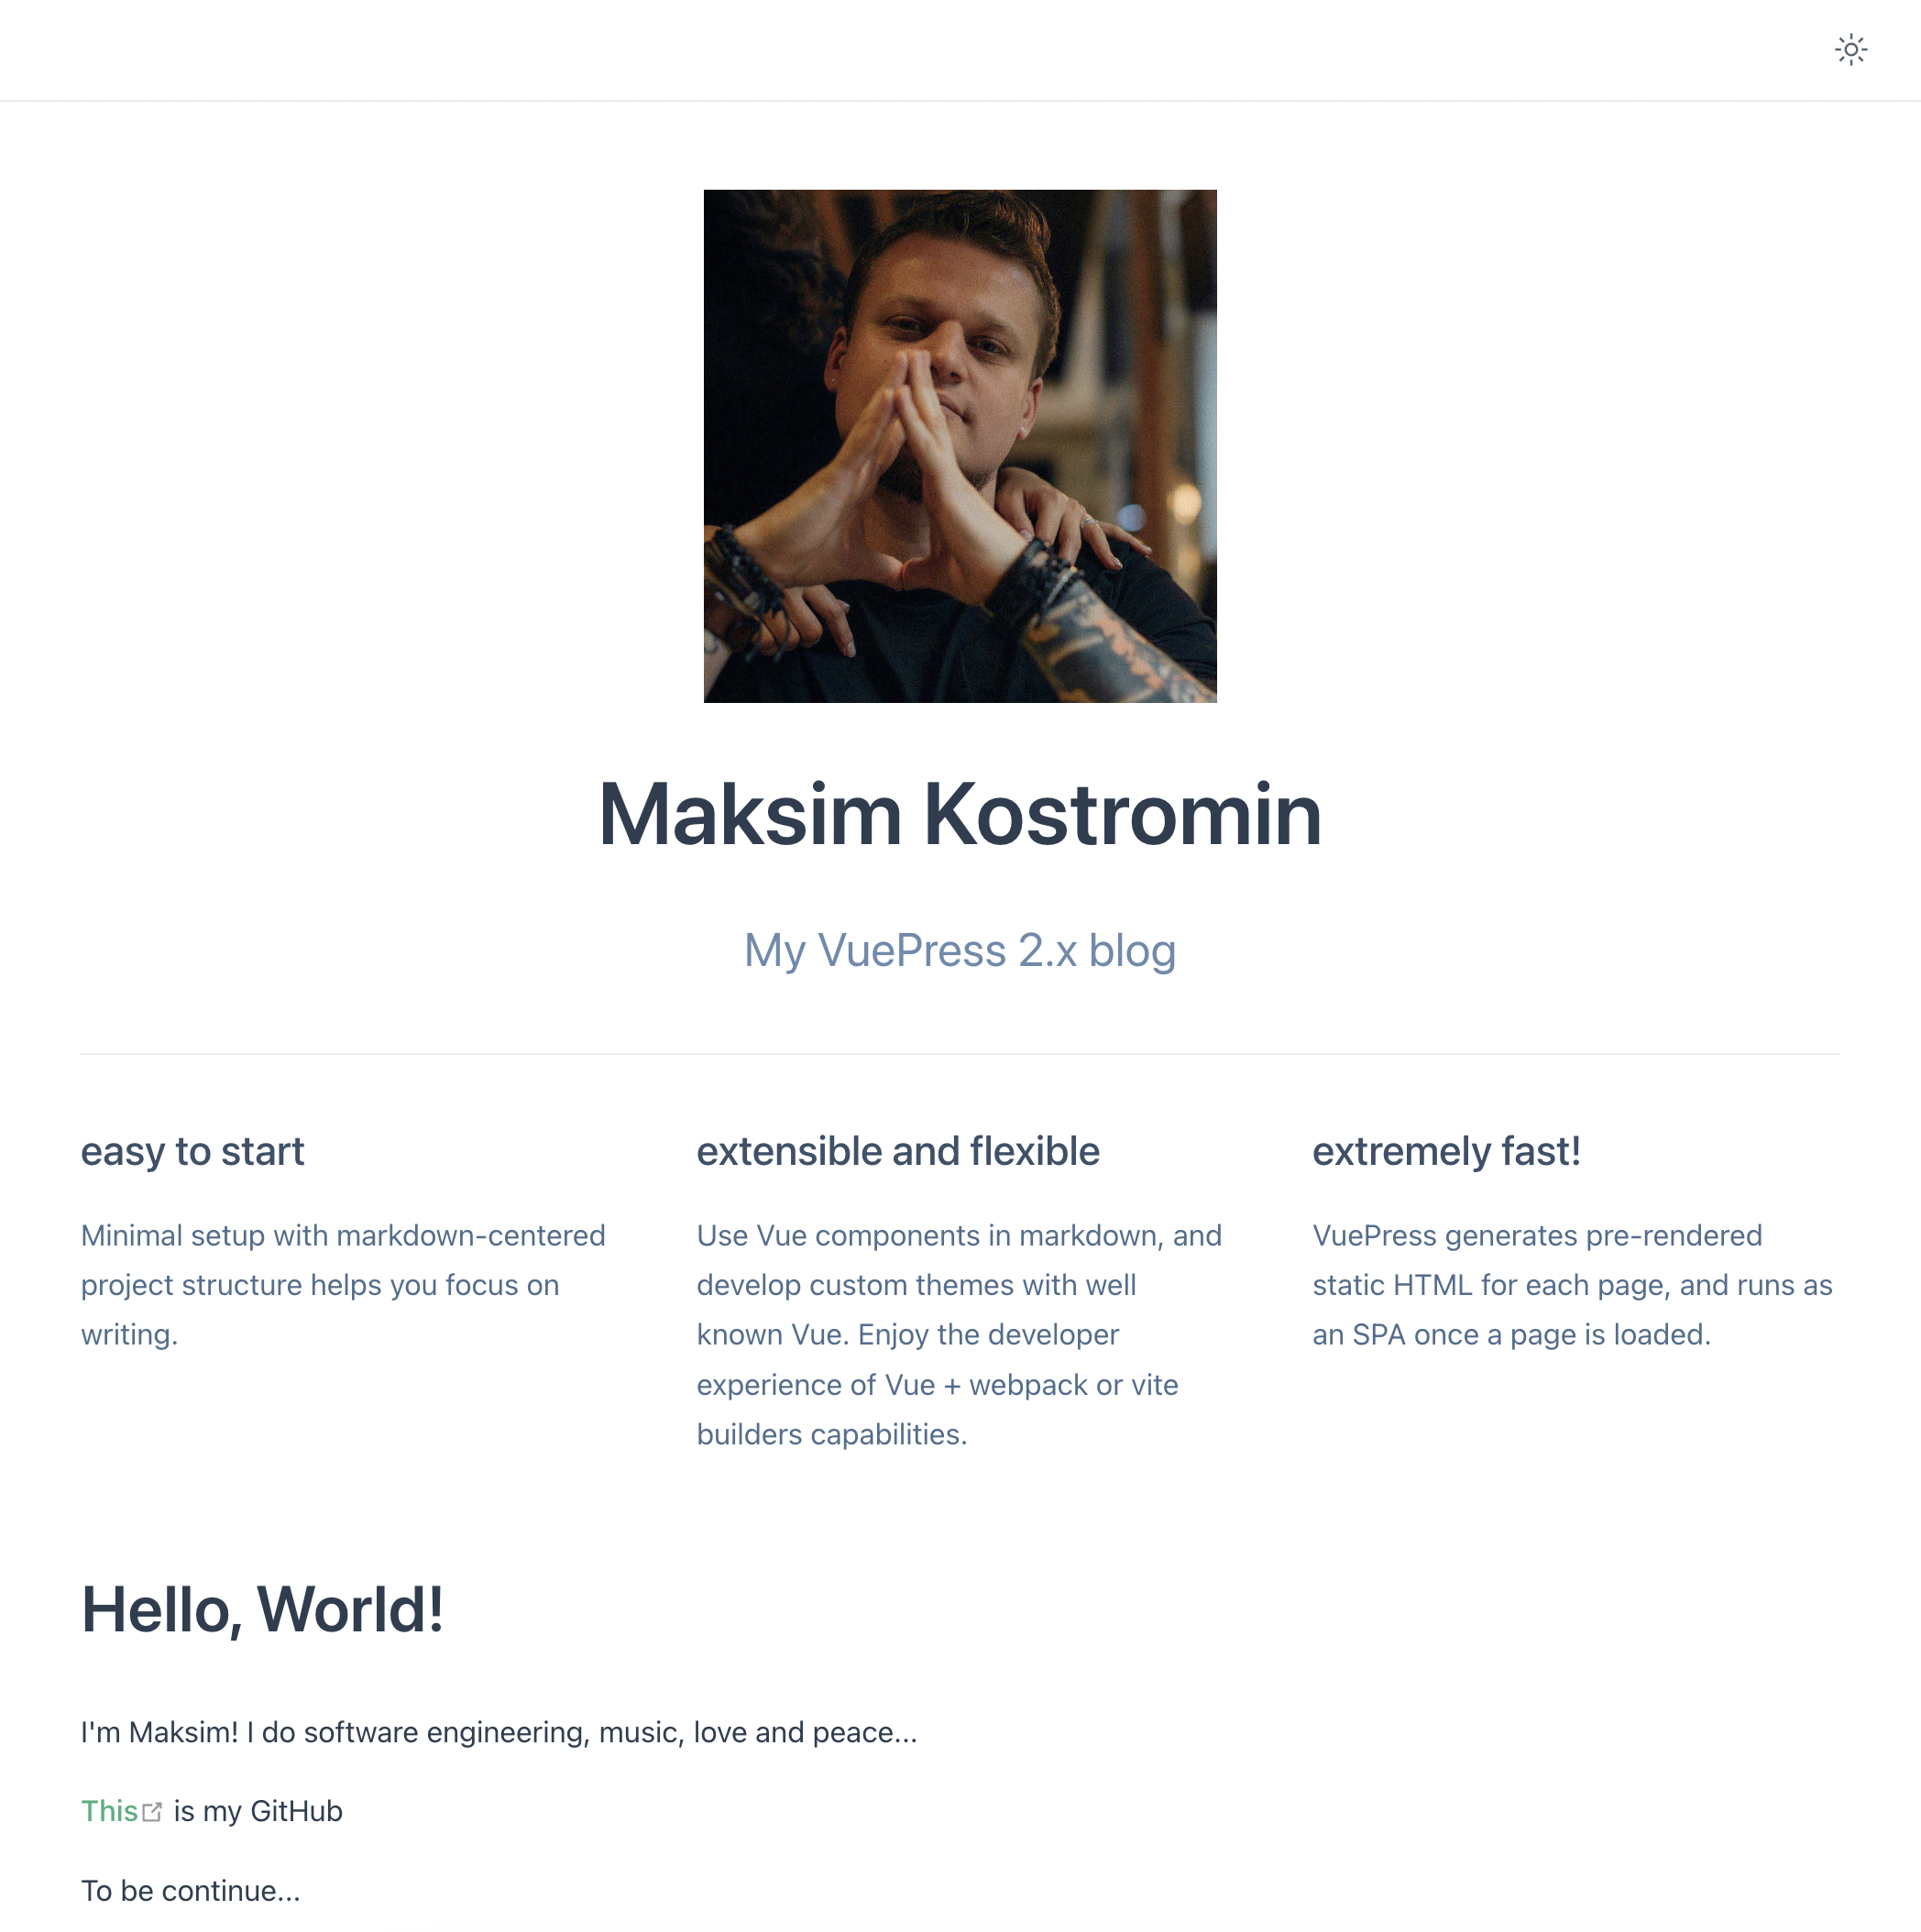
---
home: true
heroImage: me-2020-11.jpeg
heroText: Maksim Kostromin
tagline: My VuePress 2.x blog
features:
- title: easy to start
details: Minimal setup with markdown-centered project structure helps you focus on writing.
- title: extensible and flexible
details: Use Vue components in markdown, and develop custom themes with well known Vue. Enjoy the developer experience of Vue + webpack
or vite builders capabilities.
- title: extremely fast!
details: VuePress generates pre-rendered static HTML for each page, and runs as an SPA once a page is loaded.
---
# Hello, World! [](https://github.com/daggerok/customized-vuepress-2-blog/actions/workflows/ci.yaml)
I'm Maksim! I do software engineering, music, love and peace...
[This](https://github.com/daggerok) is my GitHub
To be continue...
I won't be explaining in details what this configuration is doing, in most cases it should be obvious... But anyway, you can go and read official documentation here if needed
Run dev server to test
Start developer server:
npm run dev
Open http://localhost:8080/ page to see results:
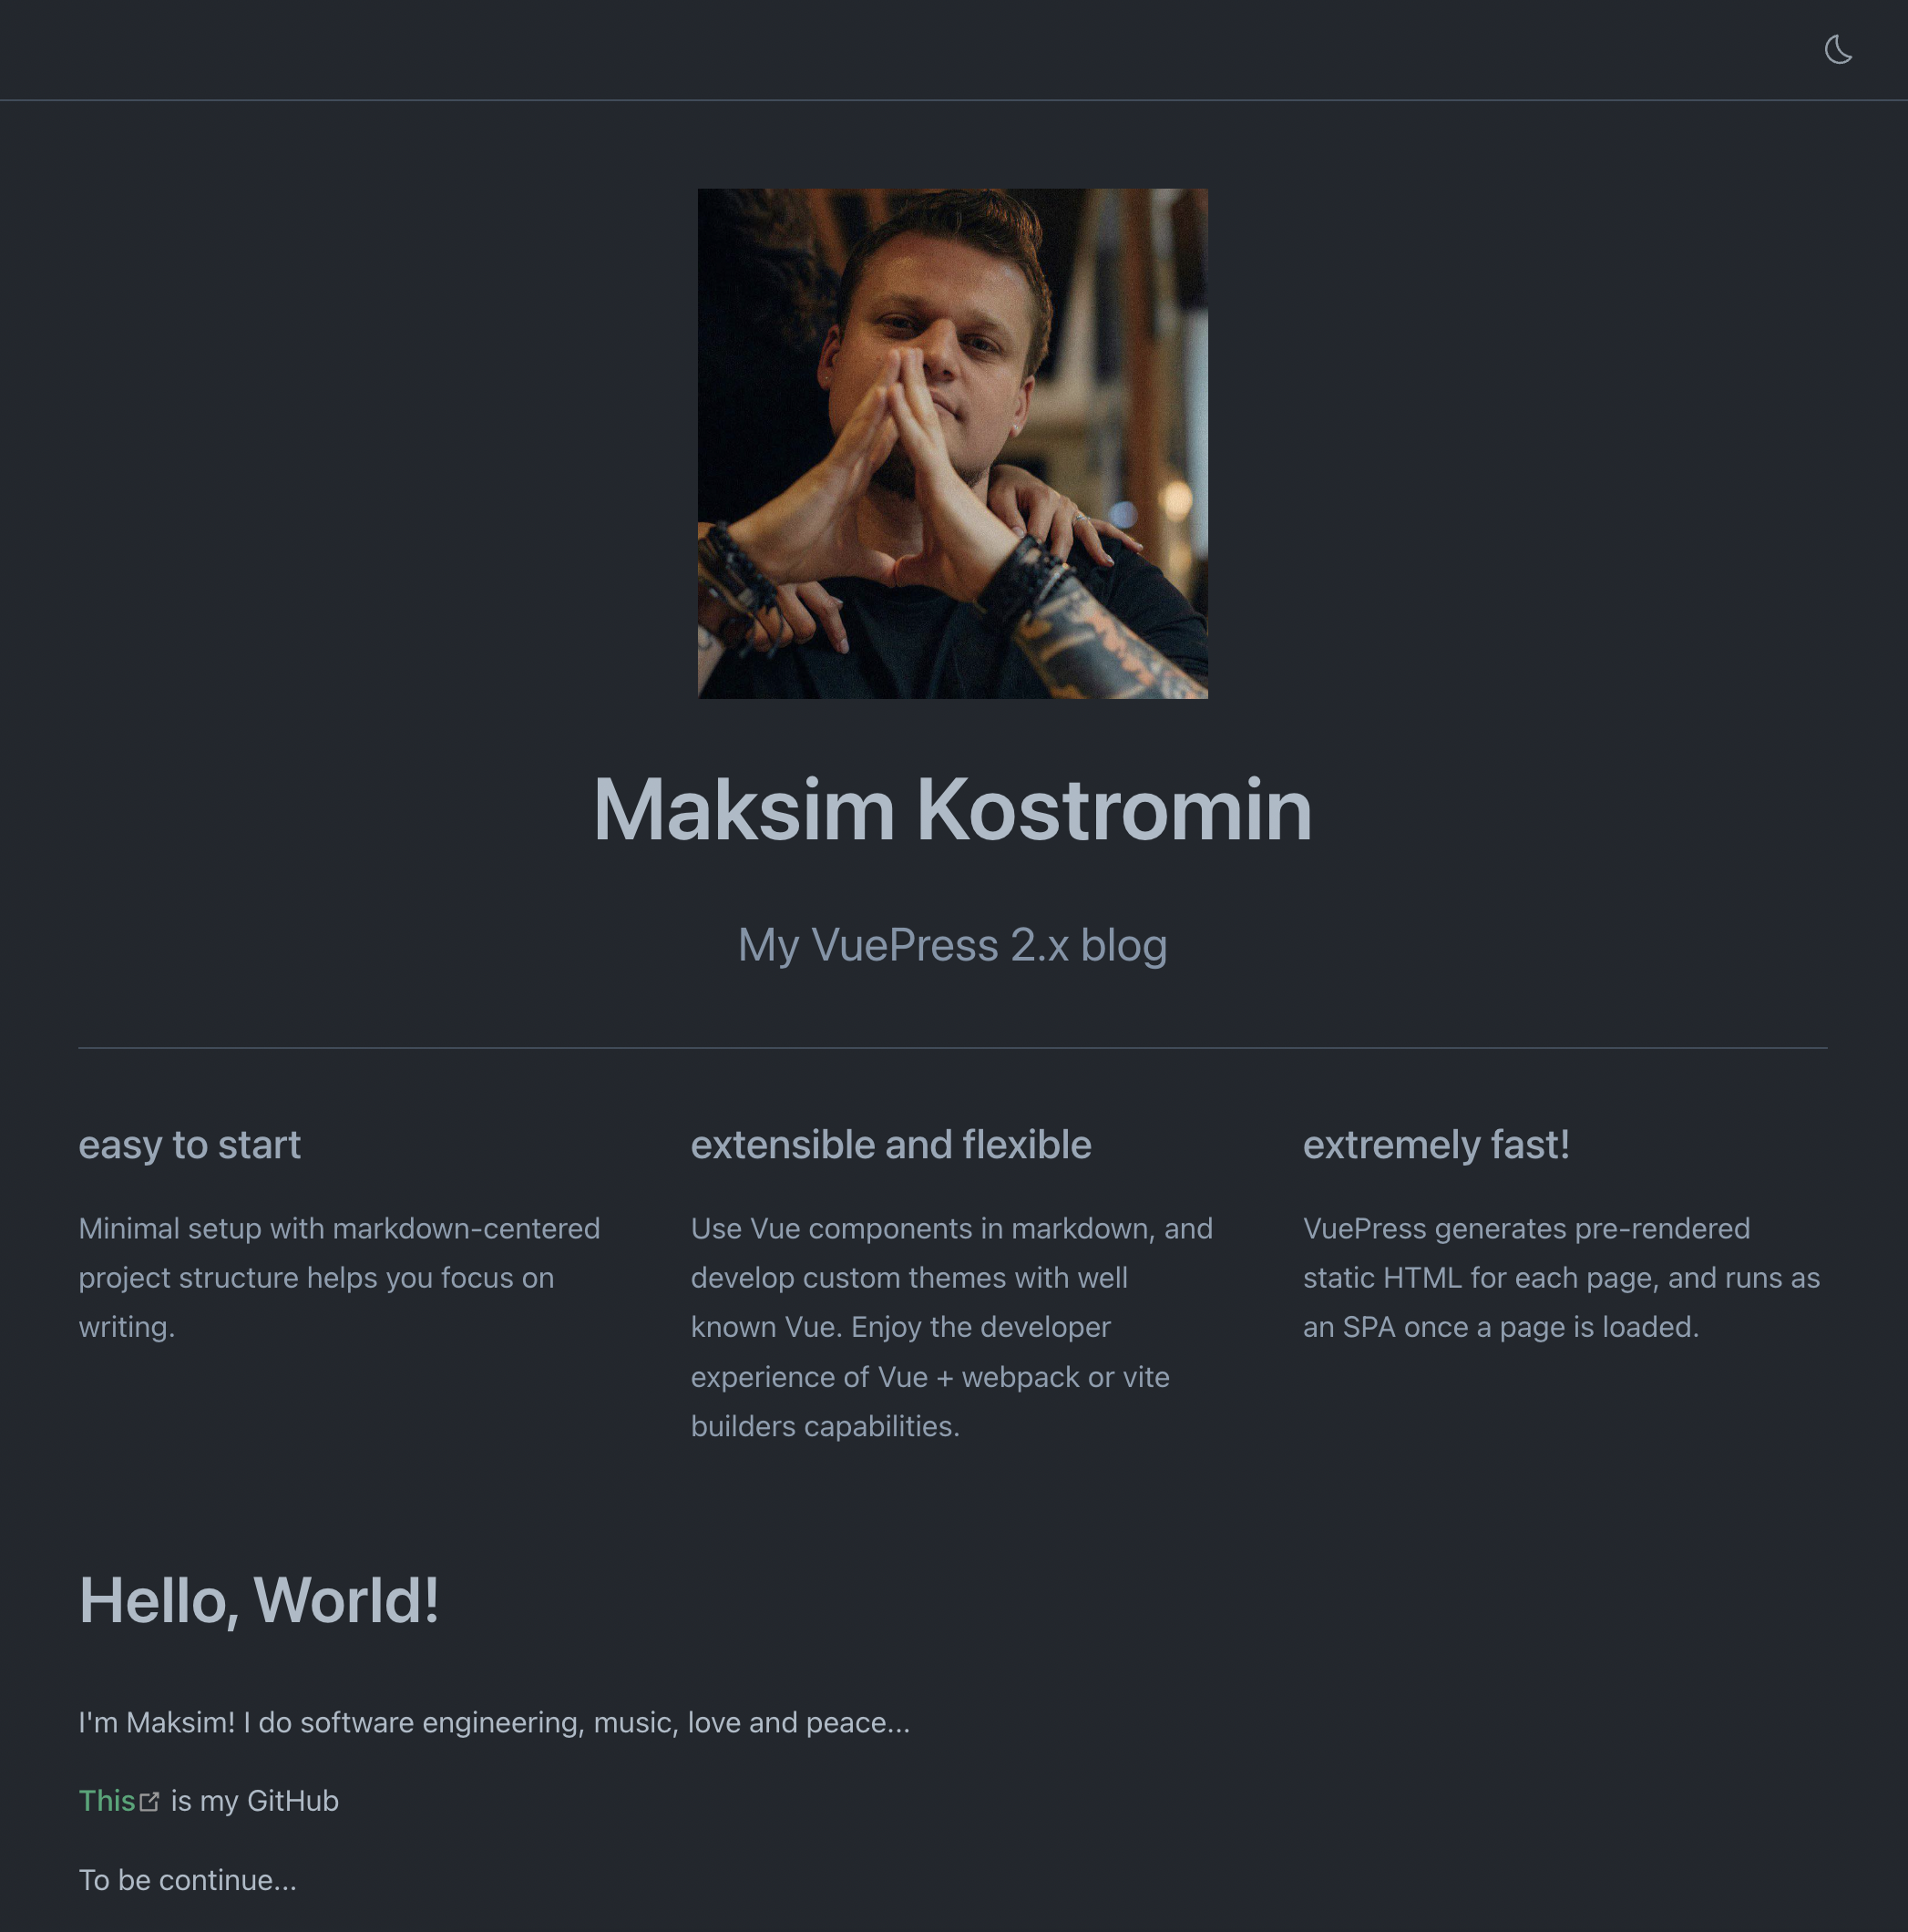
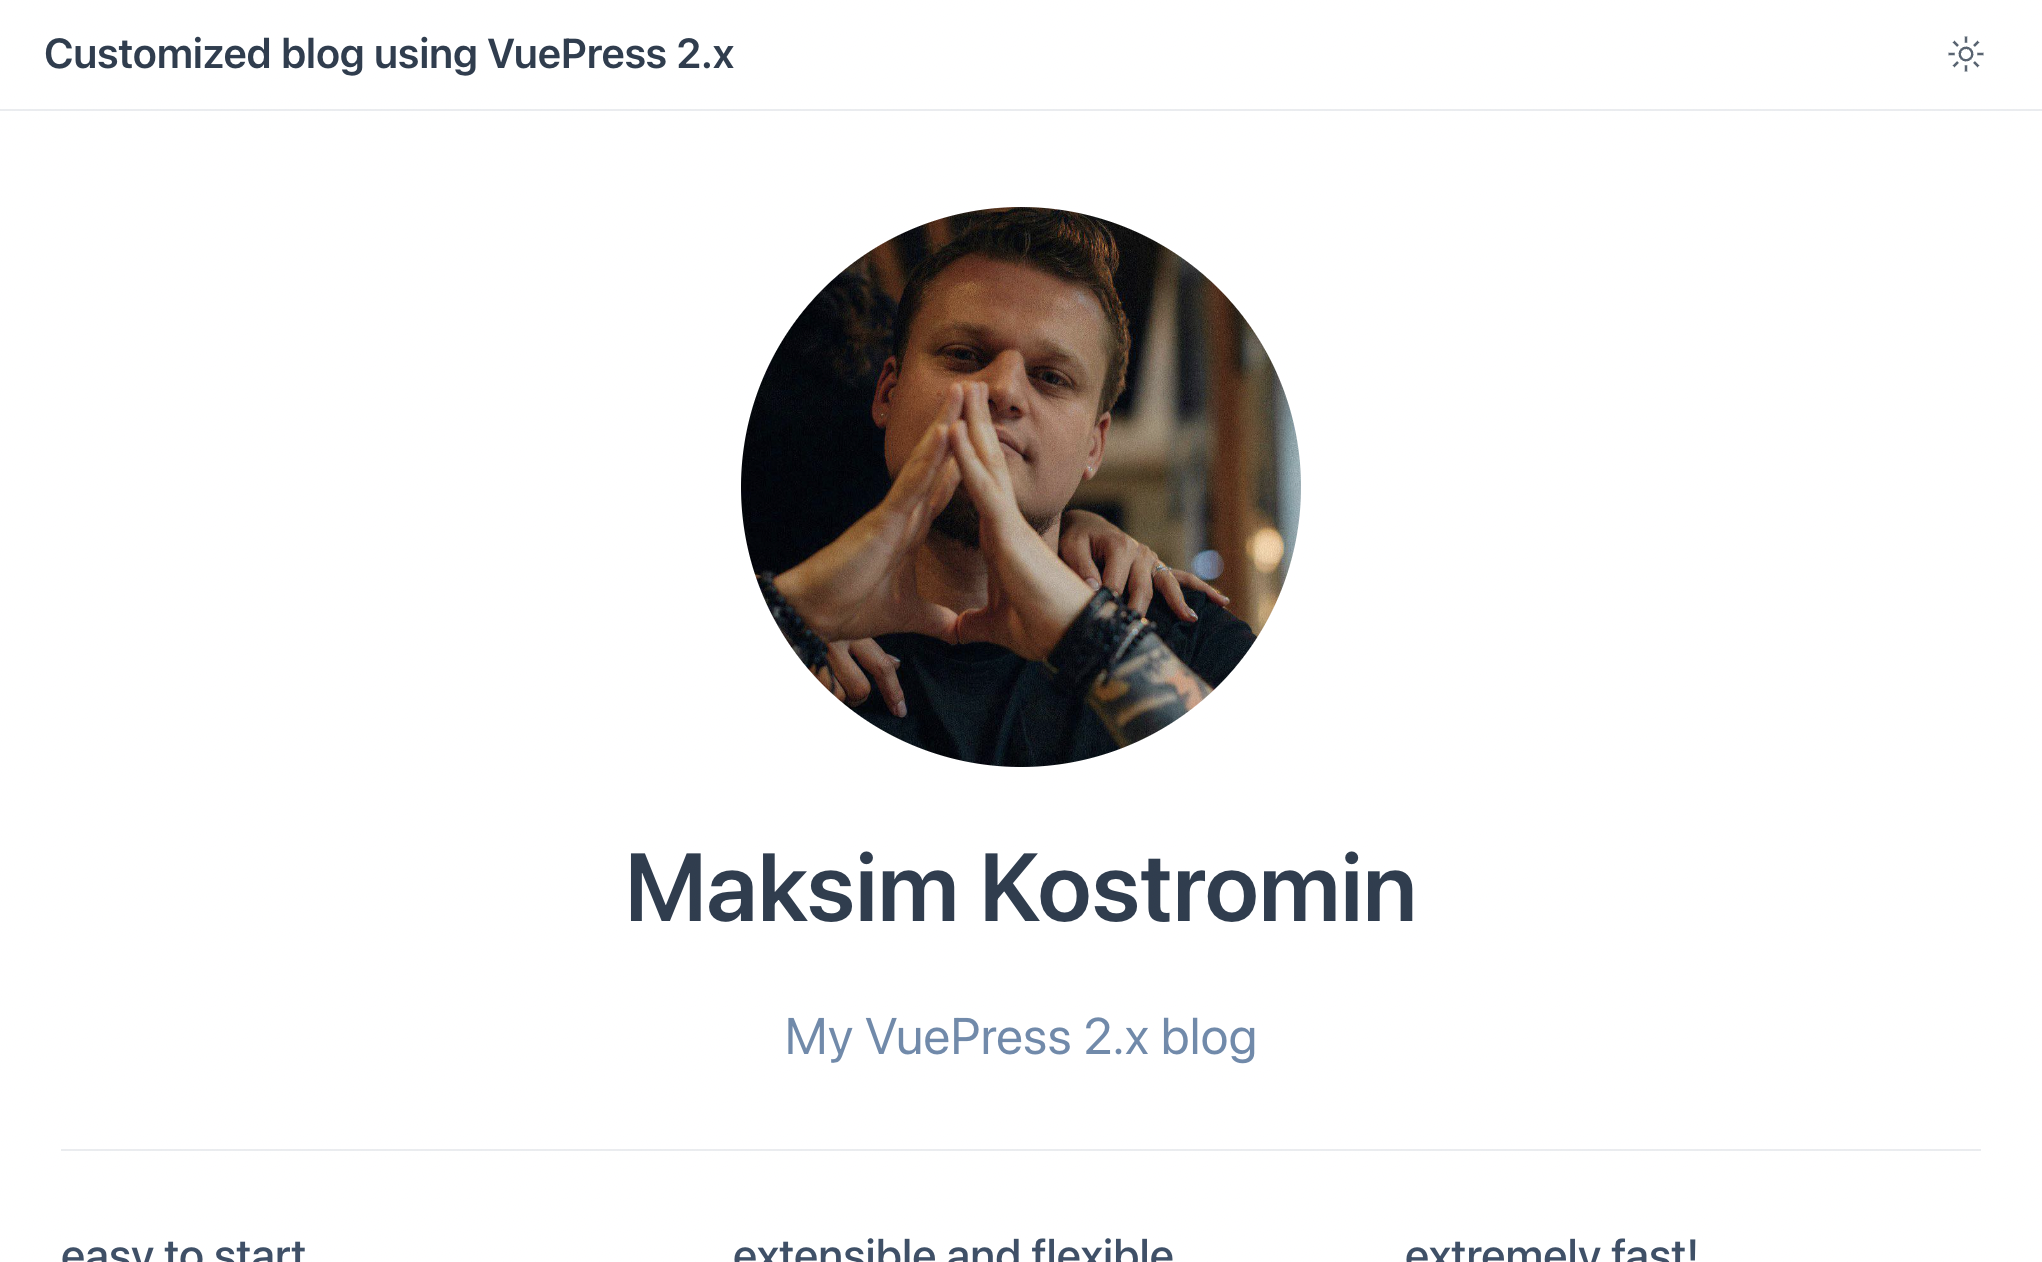
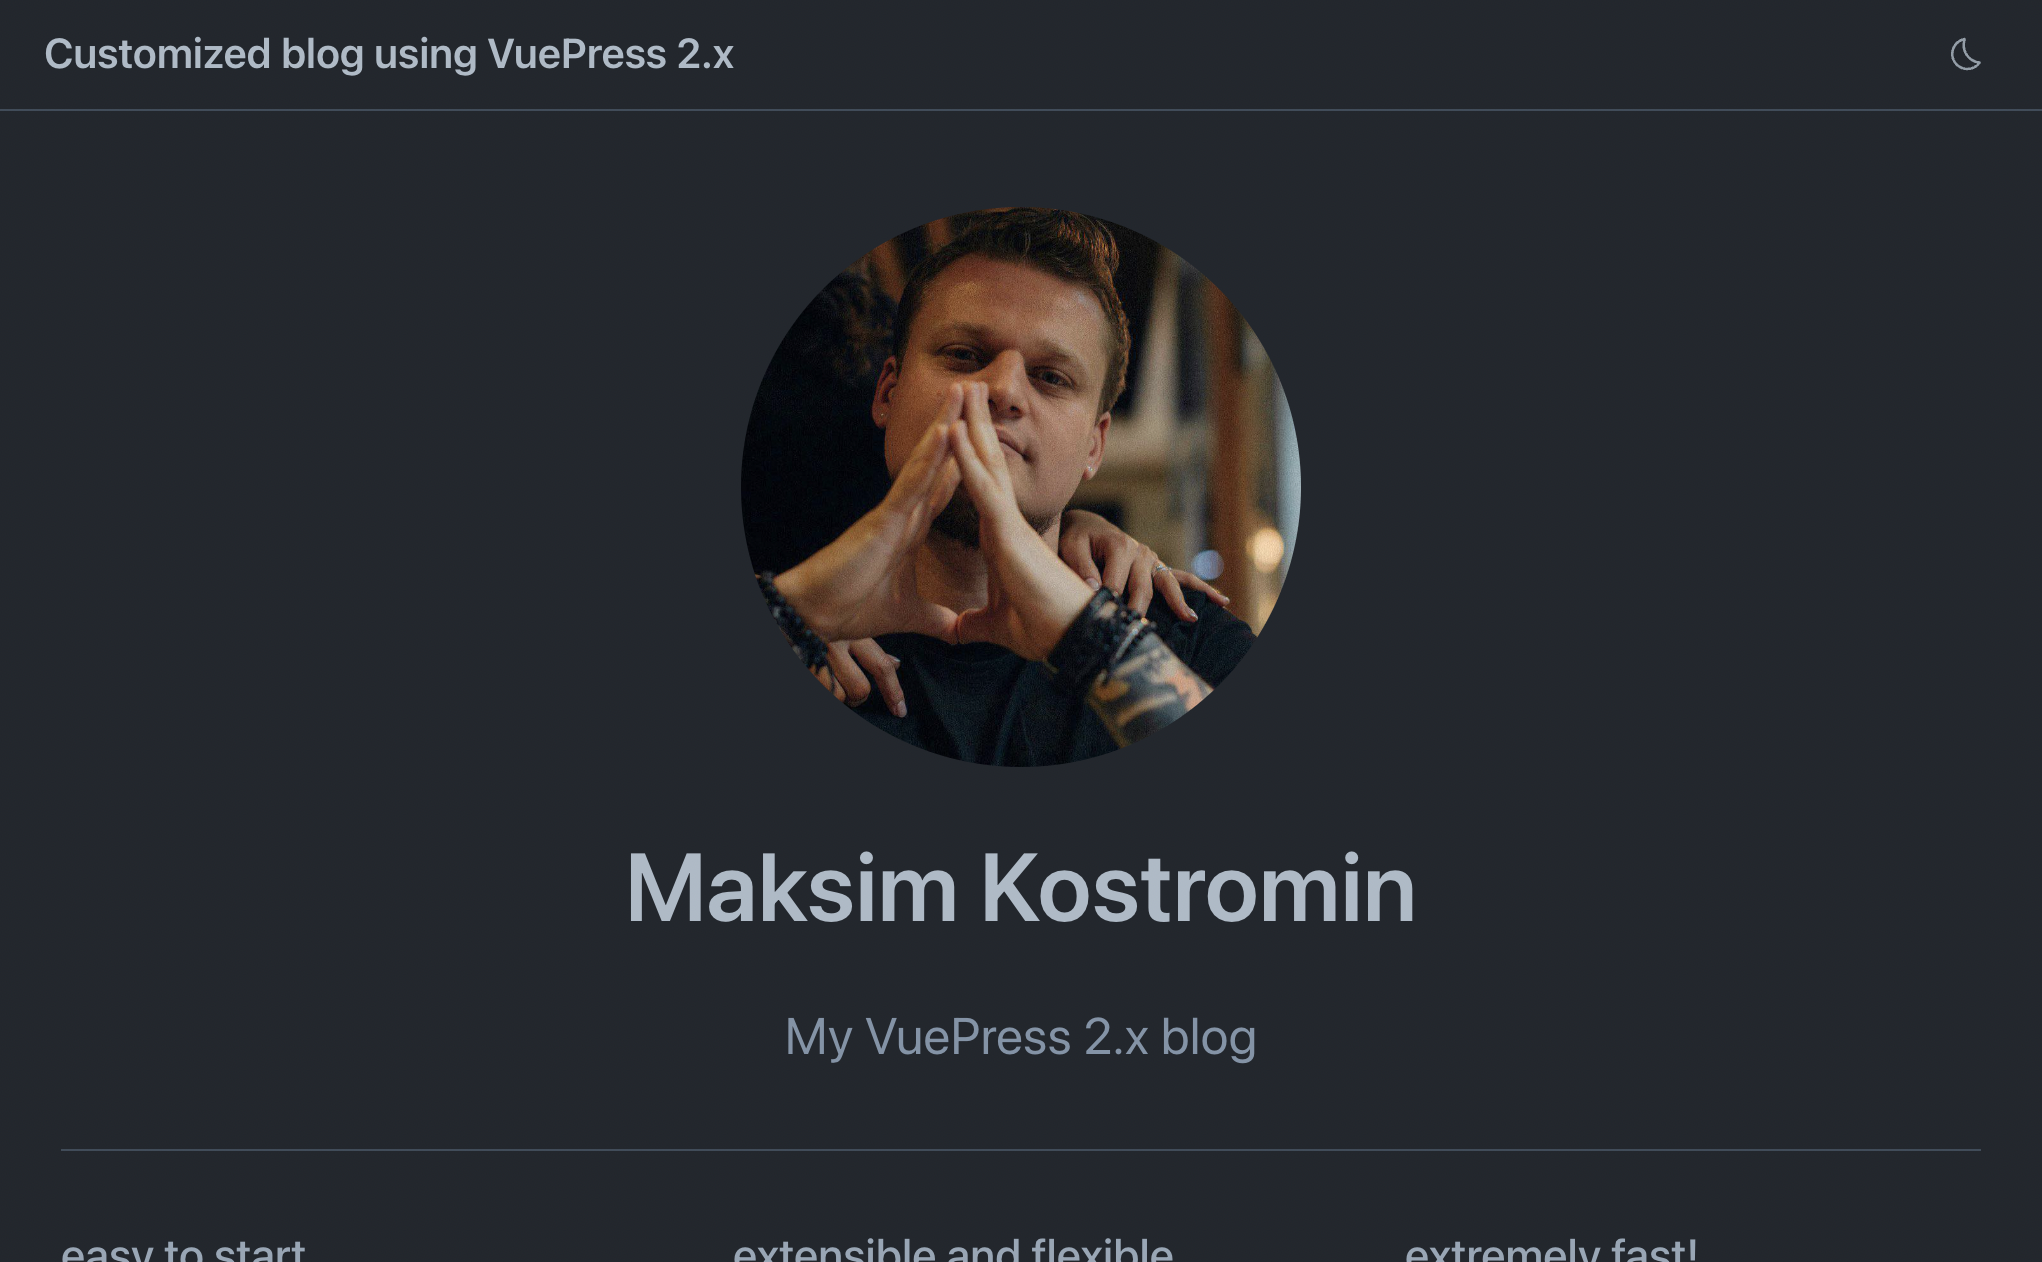
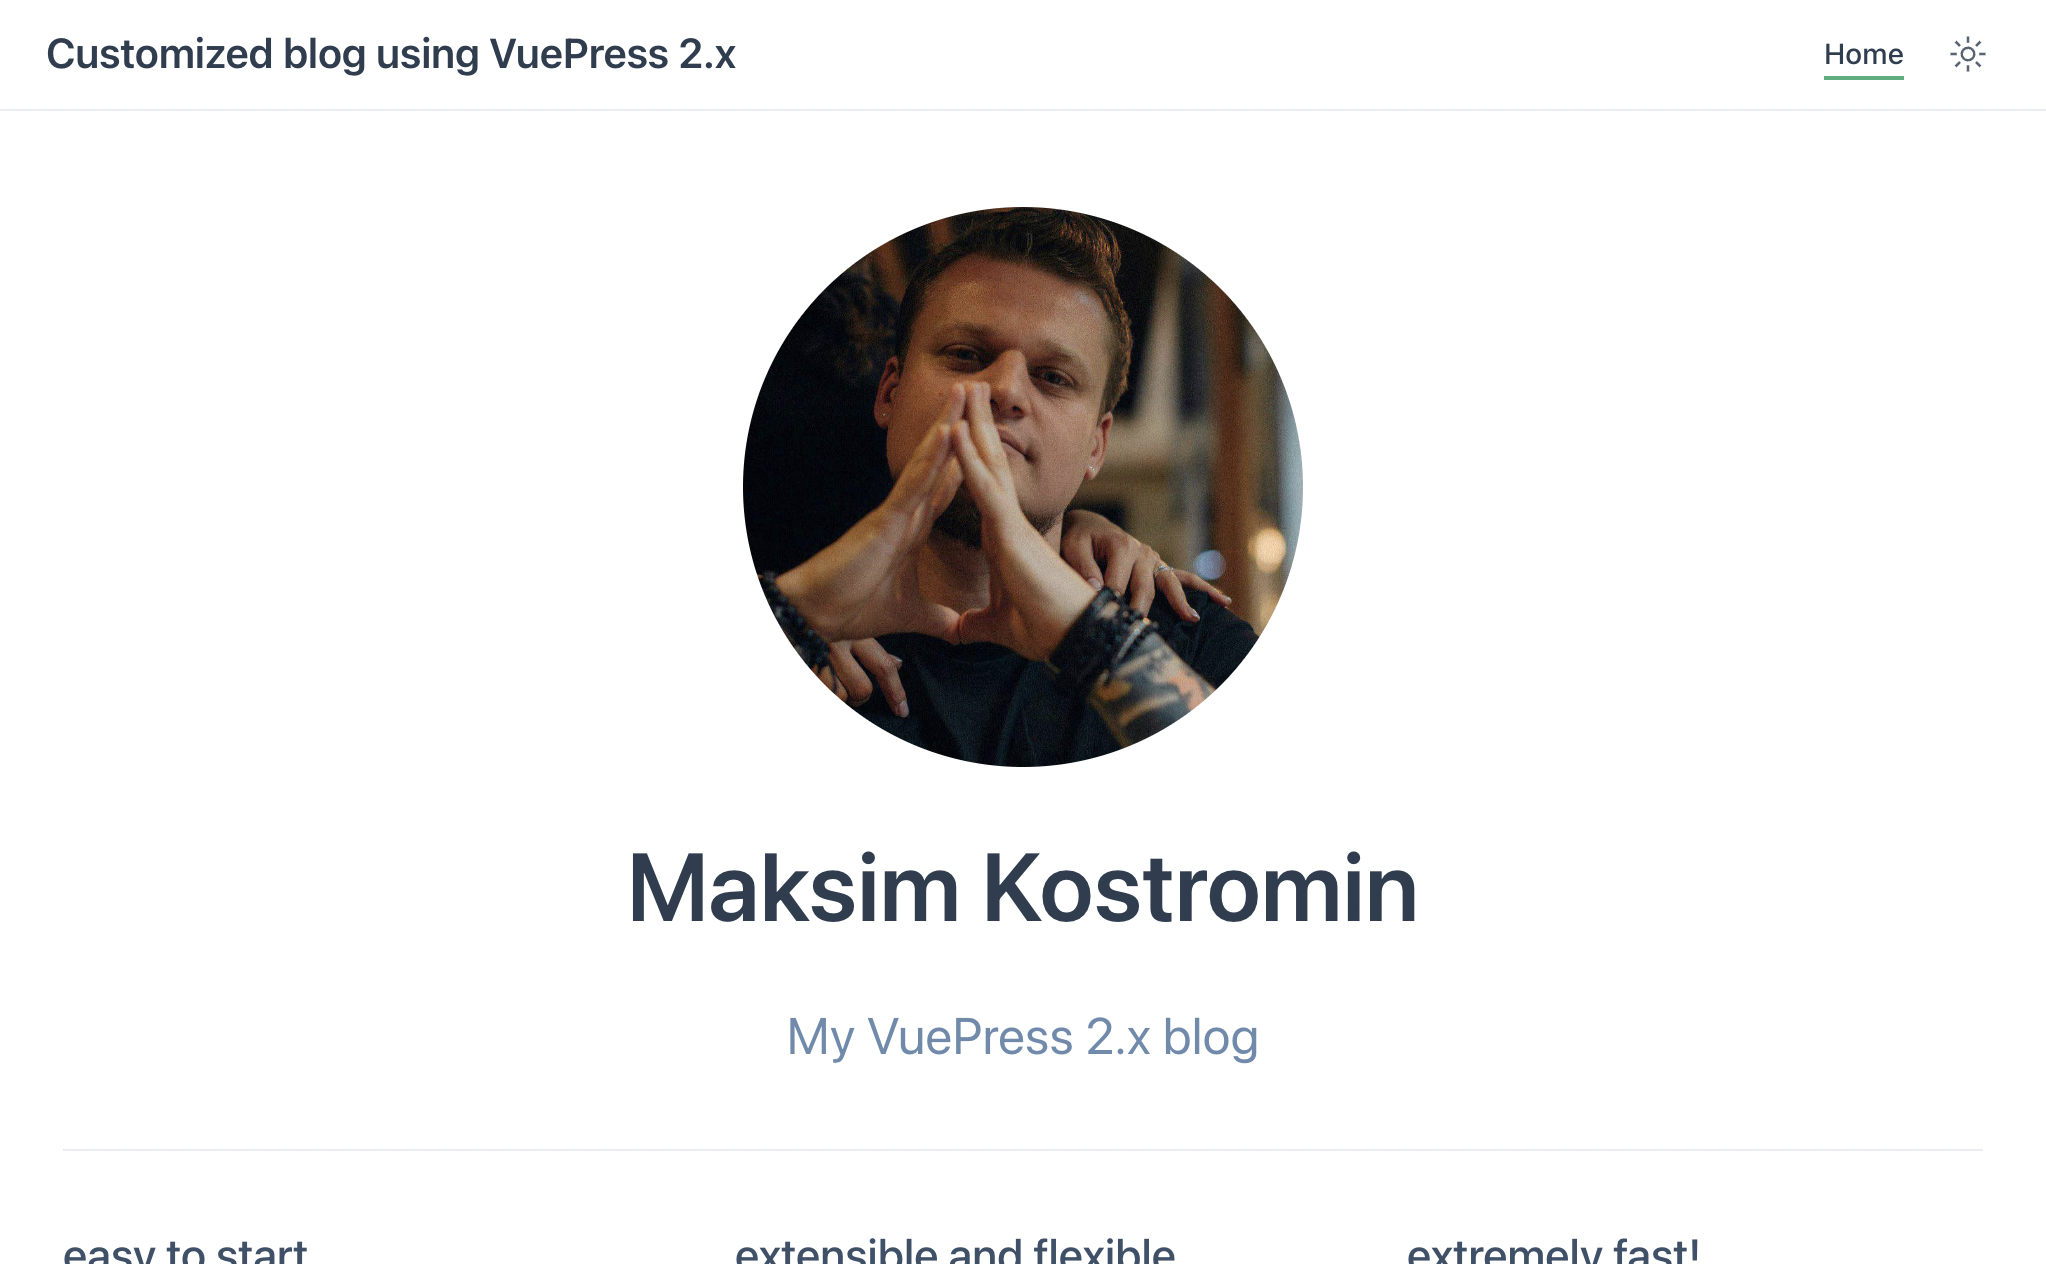
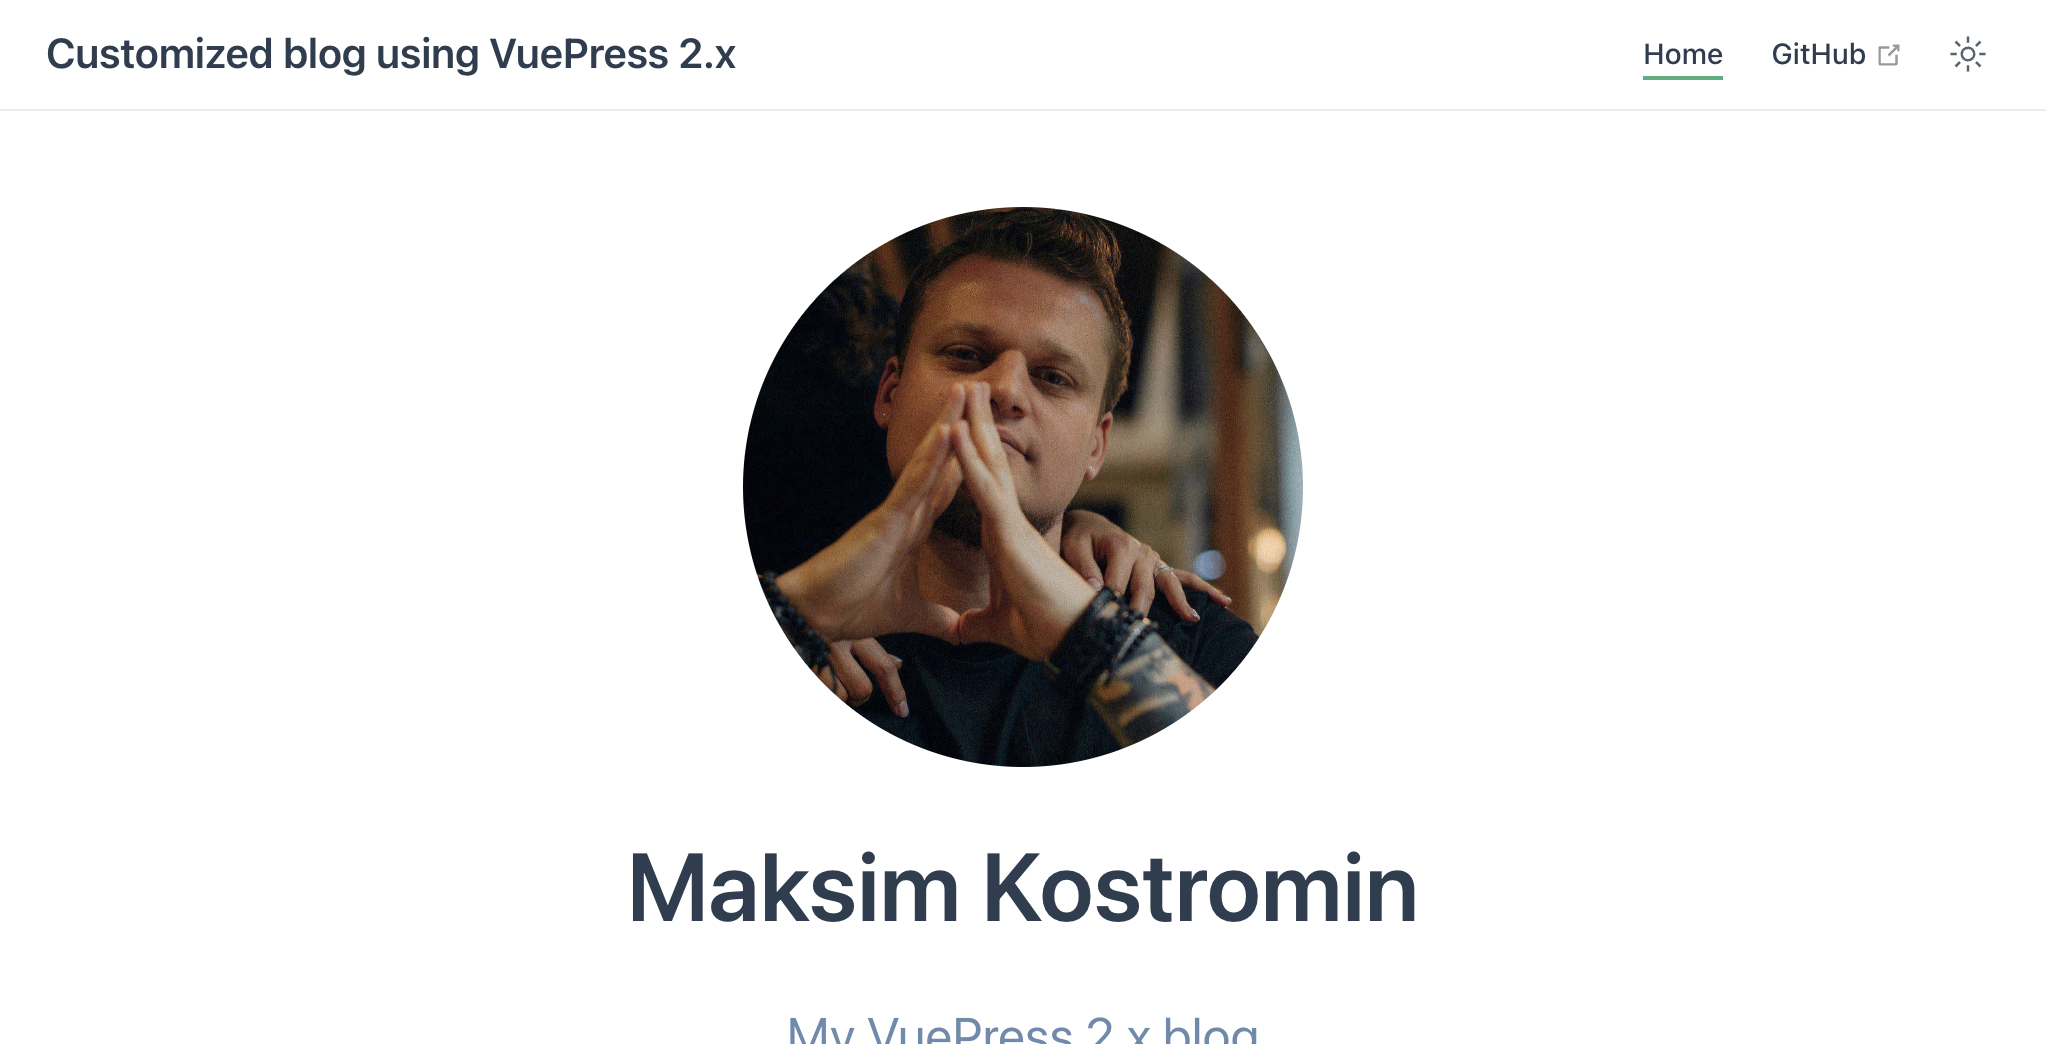
Custom styling
Currently, home page picture looking nice, but we would like to style it a bit. Let's change that picture from square to circle. To do so, we should add .vuepress/styles/index.scss with next context:
main > header > img {
  border-radius: 50%;
}
Let's check our browser on http://localhost:8080/:
![]()
![]()
Now it looks better 😎
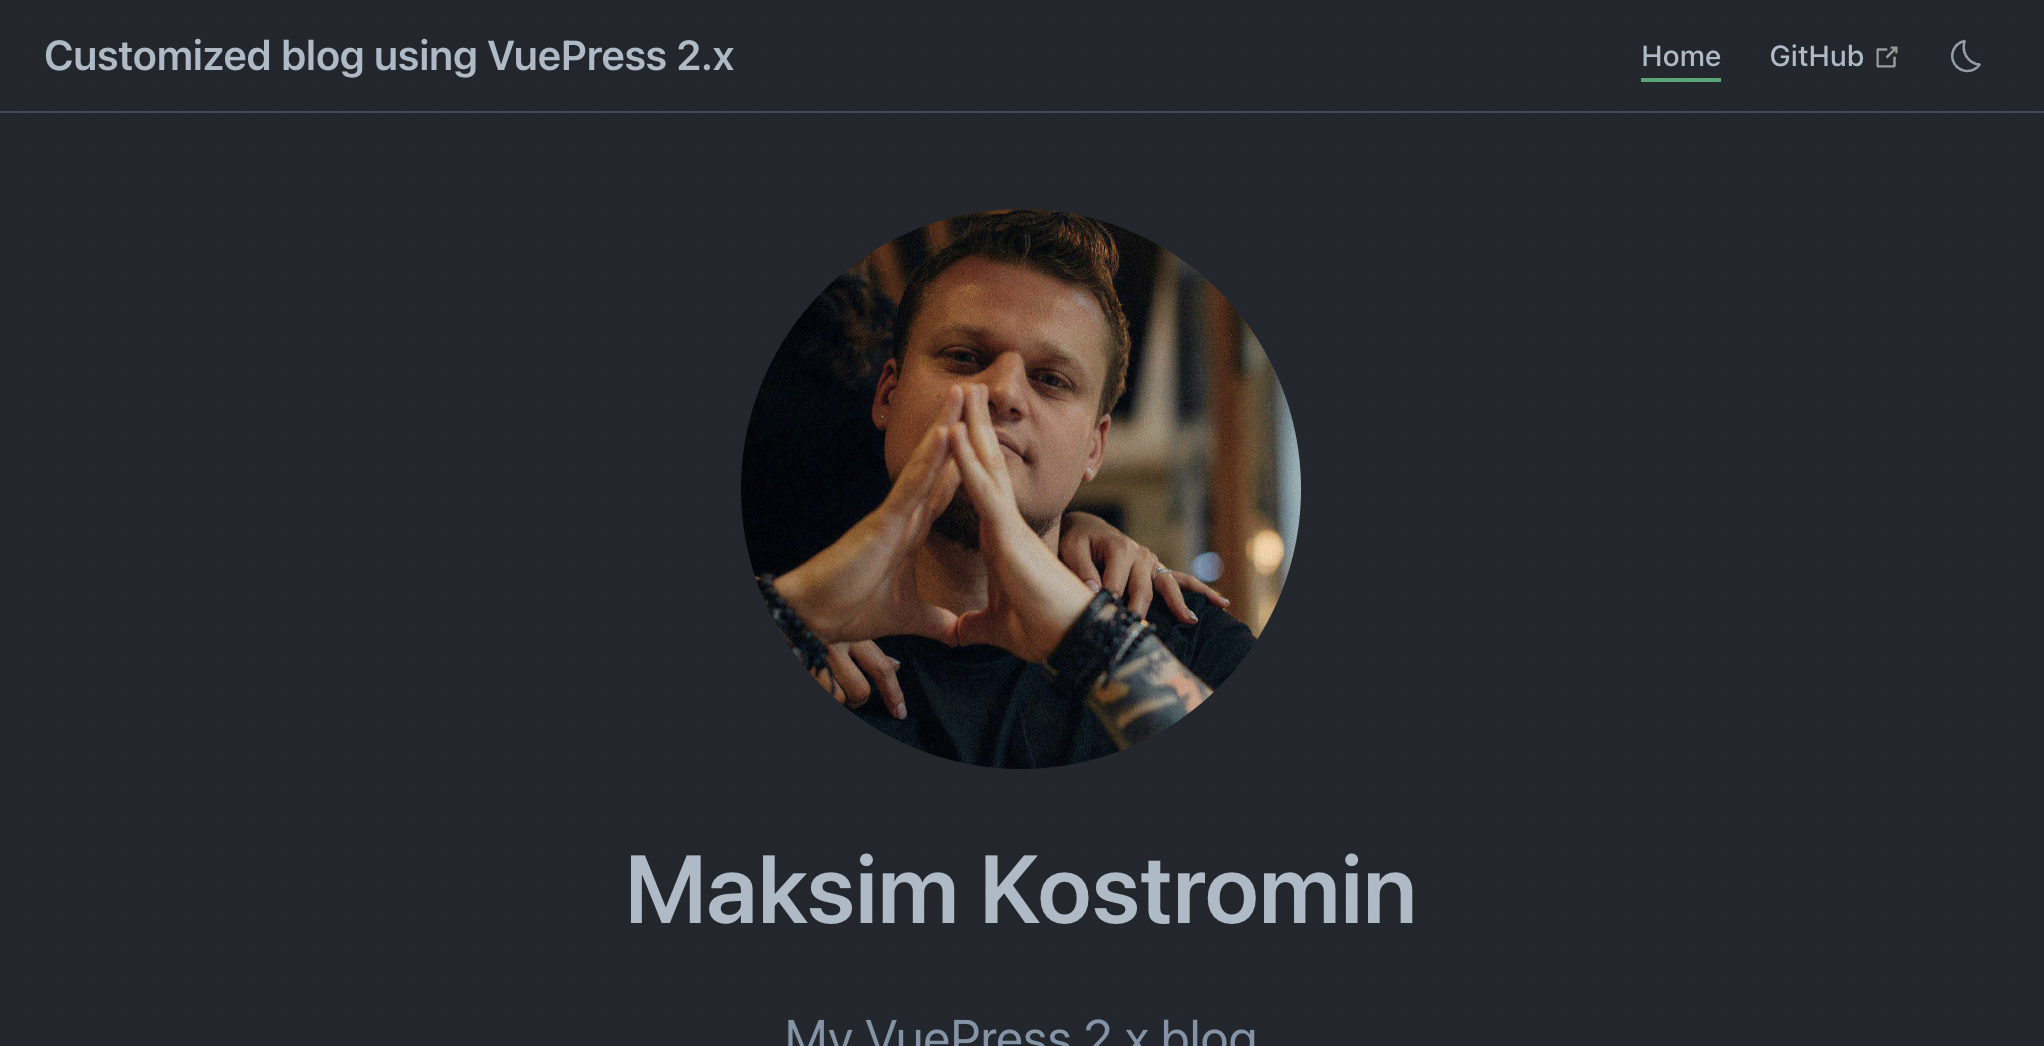
Customize navbar
One more think I wanted to mention is navbar configuration in VuePress. At the moment we don't have anything in our navbar except light / dark theme toggle, so let's configure it according to our needs...
Navbar title
Let's start from title... In my package.json file I have description:
{
  "description": "Customized blog using VuePress 2.x"
}
So I would like to use it as my blog title. To implement this I should create .vuepress/config.ts file and add necessary configuration:
import { defineUserConfig } from 'vuepress';

// @ts-ignore // const { name, description } = require(`${process.cwd()}/package.json`)
const getPackageJsonFile = await import('../package.json', { assert: { type: 'json' } });
const { description } = getPackageJsonFile.default;

export default defineUserConfig({
    title: description,
});
Let's back to browser:
Navbar links
With time, we will have many other pages, maybe we will add About page together with Contacts and so on...
Home page link
At this point of time I think it would be nice to start from link to main Home page, so any other links could be added latest similarly. Navbar bar links configuration also should be done in .vuepress/config.ts file:
import { defaultTheme, defineUserConfig } from 'vuepress';

const getPackageJsonFile = await import('../package.json', { assert: { type: 'json' } });
const { description: title } = getPackageJsonFile.default;

export default defineUserConfig({
    title,
    theme: defaultTheme({
        navbar: [
            { text: 'Home', link: '/' },
        ],
    }),
});
Now let's check our browser:

GitHub repository link
Additionally, we may want to share GitHub or GitLab repository where our blog source codes live. Even for ourselves it would be easier simply just click to GitHub link and quickly edit post if we would like to change something or fix some misspell... In config.ts file we should tell VuePress our GitHub username and repository name. My repository FQDN URL in this case is https://github.com/daggerok/customized-vuepress-2-blog, so I should use daggerok/customized-vuepress-2-blog part of it as repo value. It is enough to have GitHub navbar link, but I would like also specify docsBranch and docsDir values:
import { defaultTheme, defineUserConfig } from 'vuepress';

const getPackageJsonFile = await import('../package.json', { assert: { type: 'json' } });
const { description: title } = getPackageJsonFile.default;

export default defineUserConfig({
    title,
    theme: defaultTheme({
        navbar: [
            { text: 'Home', link: '/' },
        ],
        repo: 'daggerok/customized-vuepress-2-blog',
        docsBranch: 'master',
        docsDir: '.',
    }),
});
Now let's check our browser:
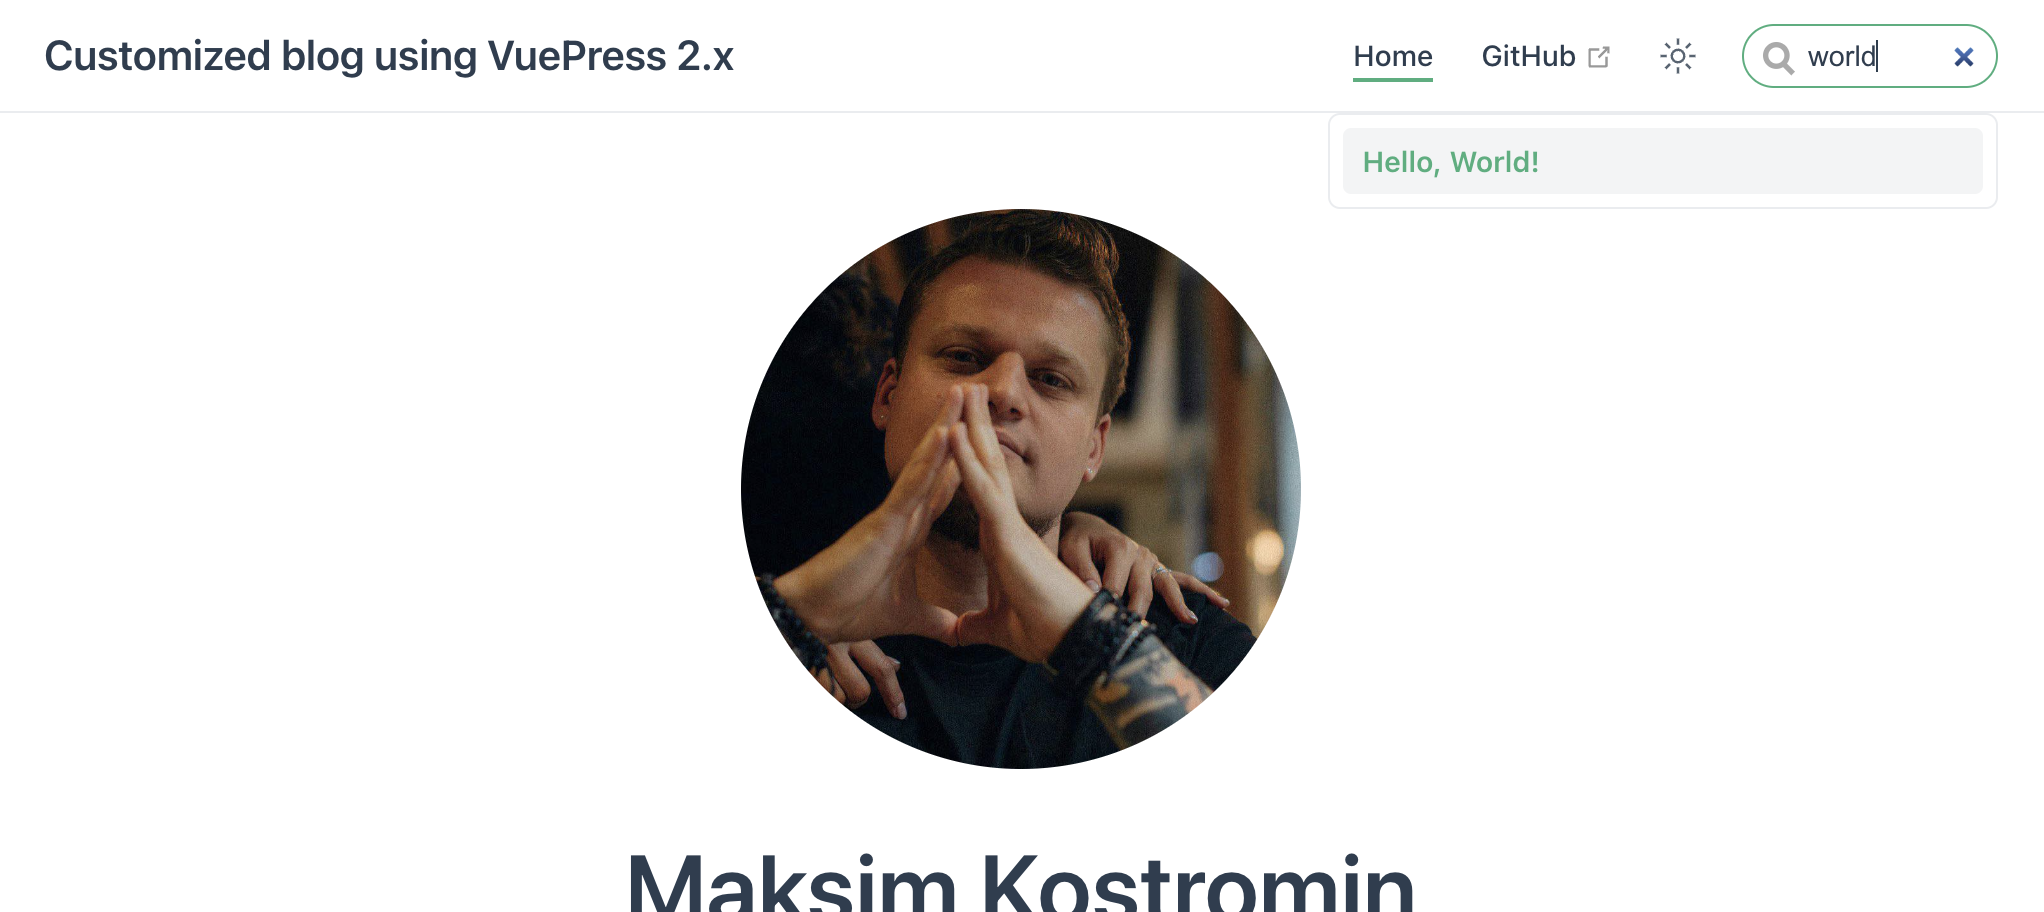
Navbar search
VuePress has awesome plugin: @vuepress/plugin-search, with that plugin we can quickly add basic search capabilities to our blog. Lets install it:
npm i -ED @vuepress/plugin-search@next
And configure, as usual in config.ts file:
import { searchPlugin } from '@vuepress/plugin-search';

const getPackageJsonFile = await import('../package.json', { assert: { type: 'json' } });
const { name, description: title } = getPackageJsonFile.default;

export default defineUserConfig({
    title,
    theme: defaultTheme({
        navbar: [
            { text: 'Home', link: '/' },
        ],
        repo: 'daggerok/customized-vuepress-2-blog',
        docsBranch: 'master',
        docsDir: '.',
    }),
    plugins: [
        searchPlugin(),
    ],
});
Cool! Now we can check our complete navbar with search functionality in action:
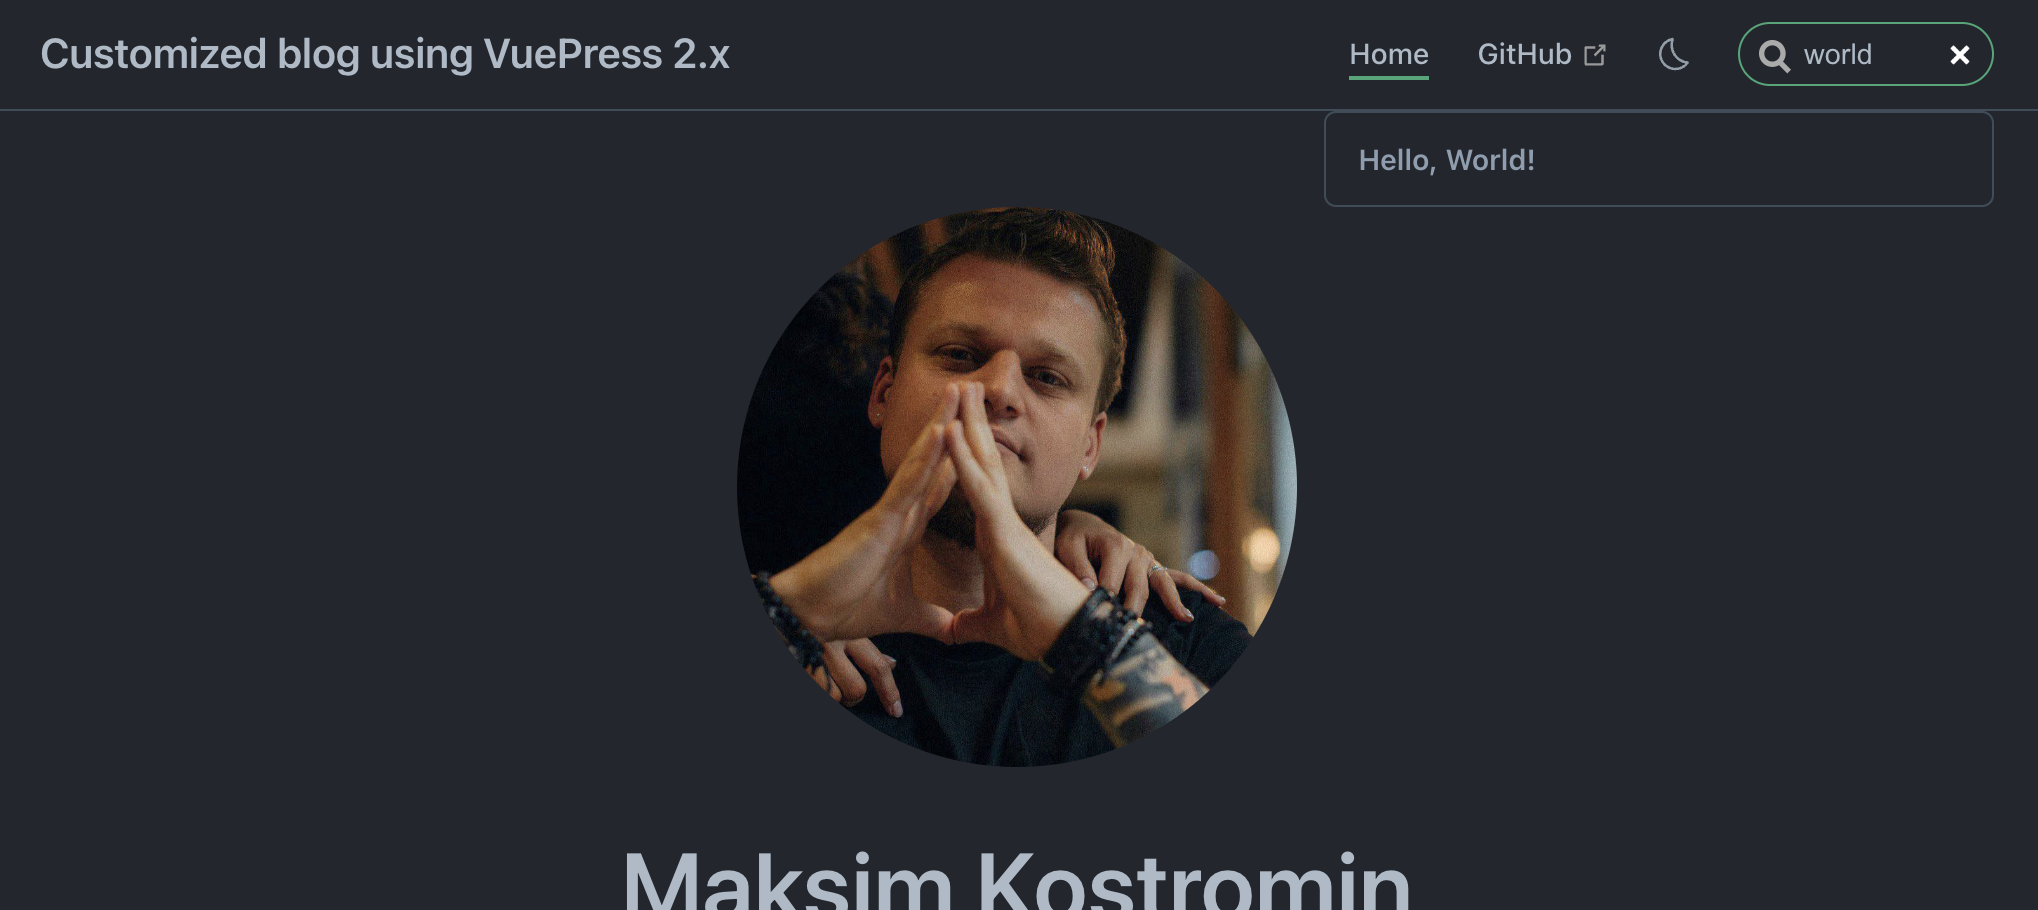
Deployment
We've done a lot so far 🤪 It's time to let internet know about it 😁
To do so:
- First of all, let's install required software:We will be using it to run our NPM-scripts with specific environment variable in cases when its needed
npm i -ED cross-env - Then let's add two npm-scripts into
pacjage.jsonfile:Script{ "scripts": { "build": "vuepress build .", "build-github-pages": "cross-env BASE_HREF=/customized-vuepress-2-blog/ npm run build" } }buildwill optimize our build for production, scriptbuild-github-pageswill do same, but withBASE_HREFenvironment variable will be used in next point: - Update our
.vuepress/config.tsfile like so:Here we check ifconst { name, description: title } = require(`${process.cwd()}/package.json`); export default defineUserConfig({ base: !process.env.BASE_HREF ? '/' : `/${name}/`, title, // other part is skipped... });BASE_HREFenv. variable wasn't passed, then we know that base must be/. otherwise it should depends on our repository name, for example:/customized-vuepress-2-blog/ - Create GitHub repository if its not yet created, commit what we did so far and push all your blog source codes in here. For example into https://github.com/daggerok/customized-vuepress-2-blog repository
- Next go to repository
Settingtab, then clickPagesmanu on sidebar, then underBuild and deploymentsection chooseGitHub Actionsoption: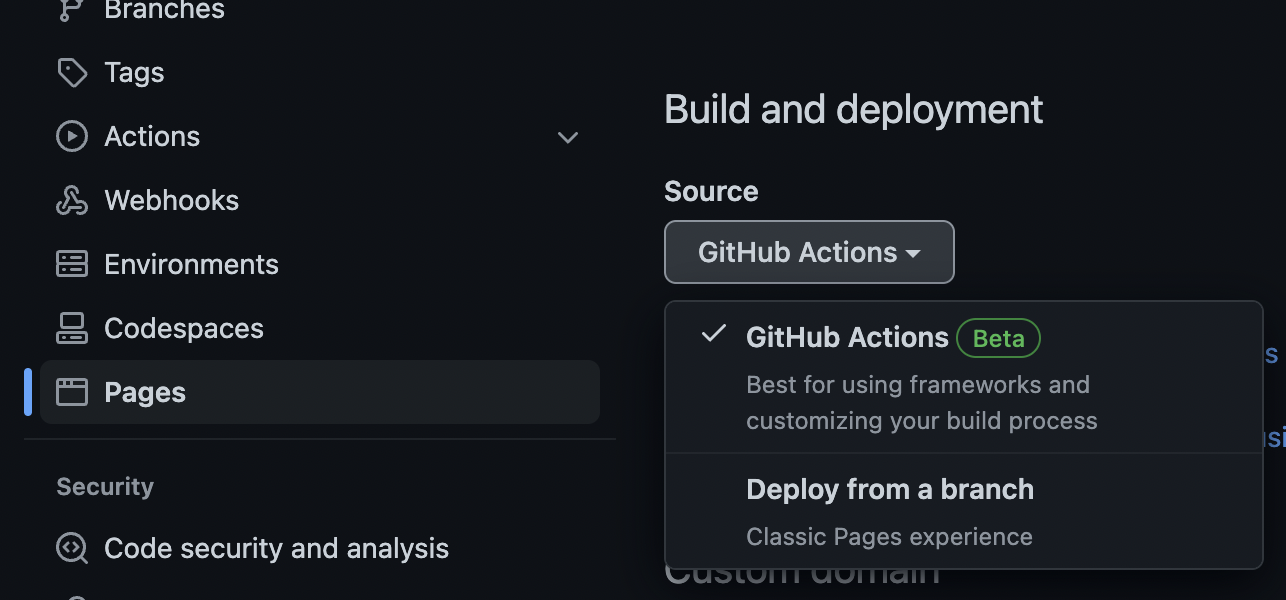
- Last, but not least, create
.github/workflows/pages.ymlfile with next content:This GitHub action contains two jobs: one for project artifact build + upload and another for its deployment on any master branch push# Sample workflow for building and deploying a VuePress site to GitHub Pages name: Deploy custom VuePress blog with GitHub Pages artifacts # Runs on pushes targeting the default branch on: push: branches: ["master"] # Allows you to run this workflow manually from the Actions tab workflow_dispatch: # Sets permissions of the GITHUB_TOKEN to allow deployment to GitHub Pages permissions: contents: read pages: write id-token: write # Allow one concurrent deployment concurrency: group: "pages" cancel-in-progress: true # Use concrete NodeJS version: env: NODE_VERSION: 18.4.0 jobs: # Build job: build: runs-on: ubuntu-latest steps: - uses: actions/checkout@v3 - name: Setup Pages uses: actions/configure-pages@v1 - uses: actions/cache@v3 id: ci with: path: | ~/.npm ~/.node key: ${{ runner.os }}-${{ hashFiles('**/package.json', '**/package-lock.json') }} - uses: actions/setup-node@v3 with: node-version: ${{ env.NODE_VERSION }} - run: npm i -E - run: npm run build-github-pages - name: Upload artifact uses: actions/upload-pages-artifact@v1 with: path: '.vuepress/dist' # Deployment job: deploy: environment: name: github-pages url: ${{ steps.deployment.outputs.page_url }} runs-on: ubuntu-latest needs: build steps: - name: Deploy to GitHub Pages id: deployment uses: actions/deploy-pages@v1 - Commit and push changes from previous step and wait for CI completion. Afterall, you should see your awesome customized VuePress blog gets published, for example here: https://daggerok.github.io/customized-vuepress-2-blog/
Create custom components
Let's say we wanna custom Footer which can be easily used in our pages or components, just like so:
# My post

My content....

<Footer />
Create component folder: .vuepress/components/layers
mkdir .vuepress/components
mkdir .vuepress\components
Create .vuepress/components/Footer.vue component:
<template>
  <div class="footer"> Maksim Kostromin © 2022-present 🙃</div>
</template>

<script>
import { defineComponent } from 'vue';
export default defineComponent({
  name: 'Footer',
});
</script>

<style scoped lang="scss">
div.footer {
  display: flex;
  justify-content: center;
  align-items: center;
  width: 100%;
  height: 3rem;
  min-height: 2rem;
  margin-top: -3rem;
  border-top: none !important;
}
</style>
Now we should help VuePress to register our components.
Install @vuepress/plugin-register-components package:
npm i -ED @vuepress/plugin-register-components@next
And finally update our .vuepress/index.ts file:
import { getDirname, path } from '@vuepress/utils';
import { registerComponentsPlugin } from '@vuepress/plugin-register-components';

const __dirname = getDirname(import.meta.url);

export default defineUserConfig({
  plugins: [
    registerComponentsPlugin({
      componentsDir: path.resolve(__dirname, './components'),
    }),
  ],

  // ...skipped after...
});
Now we can used our Footer directly in markdown files or import it in our vue components just like so:
import Footer from '@/components/Footer.vue';
Add custom local theme
Let'e imagine we want to have our blog unique, so we've decide to add our custom Footer component for every page in our blog... To do so we must create our own custom local theme.
Let's create folders .vuepress/theme and .vuepress/theme/layers which will contains custom theme files:
mkdir .vuepress/theme
mkdir .vuepress/theme/layers
mkdir .vuepress\theme
mkdir .vuepress\theme\layers
Create .vuepress/theme/layers/Layout.vue layout:
<script setup>
import ParentLayout from '@vuepress/theme-default/lib/client/layouts/Layout.vue';
import Footer from '@/components/Footer.vue';
</script>

<template>
  <div class="wrapper">
    <div class="content-wrapping-section">
      <ParentLayout/>
    </div>
    <div class="footer">
      <Footer/>
    </div>
  </div>
</template>
Create .vuepress/theme/client.ts file:
import { defineClientConfig } from '@vuepress/client';
import Layout from './layouts/Layout.vue';

export default defineClientConfig({
    layouts: {
        Layout,
        NotFound: Layout,
    },
});
Create .vuepress/theme/index.ts file:
import type { Theme } from '@vuepress/core';
import { defaultTheme, type DefaultThemeOptions } from '@vuepress/theme-default';
import { getDirname, path } from '@vuepress/utils';

const __dirname = getDirname(import.meta.url)

export const myBlogLocalTheme = (options: DefaultThemeOptions): Theme => {
   return {
      name: 'vuepress-theme-local',
      extends: defaultTheme(options),

      // override layouts in child theme's client config file:
      clientConfigFile: path.resolve(__dirname, './client.ts'),

      // add component alias. Usage:
      // import { MyComponent } from '@/components/MyComponent';
      // it will import component from .vuepress/components/MyComponent.vue file
      alias: {
         '@': path.resolve(__dirname, '..'),
      },
   };
};
Now update .vuepress/config.ts file accordingly to use it in your VuePress blog:
// ...skipped before...

import { myBlogLocalTheme } from './theme';

export default defineUserConfig({
  theme: myBlogLocalTheme({
    navbar: [
      { text: 'Home', link: '/' },
    ],
    repo: 'daggerok/customized-vuepress-2-blog',
    docsBranch: 'master',
    docsDir: '.',
  }),

  // ...skipped after...
});
See: Official extending section for more details
Congrats! 🎉💪👏